Introduction
Welcome to the documentation of skiftOS!
🛈 Note
This book is a work in progress, and is not yet complete. If you would like to contribute to the documentation, please refer to the contributing guide.
Building
This guide provides instructions for building skiftOS from source.
Prerequisites
- Linux or macOS
- Clang (18 or later)
- Python (3.11.5 or later)
- Tools:
llvm,clang,ninja,nasm,qemu - Installation: Use your system's package manager (e.g.,
apton Ubuntu) to install these dependencies.
Instructions
-
Prerequisites:
Verify that you have the required dependencies installed.
Ubuntu
apt update

apt install build-essential git ninja-build libsdl2-dev nasm gcc-multilib qemu-system-x86 mtools liburing-dev

bash -c "$(wget -O - https://apt.llvm.org/llvm.sh)" llvm 17
Arch Linux
pacman -Syu git clang llvm nasm qemu-full gptfdisk mtools liburing sdl2 -
Clone the Repository:
git clone https://codeberg.org/skift/os.git cd skift -
Set Up Build Environment:
./skift.sh tools setup🛈 Note
On Ubuntu, this step also installs dependencies. -
Verify Setup:
./skift.sh tools doctor -
Download Dependencies:
./skift.sh install -
Build and Run:
-
In Virtual Machine:
./skift.sh boot🛈 Note
Requires a graphical environment and QEMU with graphics support (SDL or GTK). For headless servers, build a disk image instead:./skift.sh dist --format=hdd -
In simulator:
./skift.sh run --release hideo-shell🛈 Note
The--releaseflag is optional and can be omitted for a debug build.
Enjoy! You now have a working installation of skiftOS.
Need Help? Join the Discord server for assistance in the
#build-issueschannel. -
Running
This guide provides instructions for running skiftOS on QEMU or real hardware using the HDD file.
On QEMU
1. Obtain OVMF firmware
- Using the package manager:
- Arch Linux:
pacman -S edk2-ovmf - Ubuntu:
apt install ovmf - File location:
/usr/share/OVMF/x64/OVMF.fd
- Arch Linux:
- Alternatively, Download OVMF
2. Obtain QEMU
- Using the package manager:
- Arch Linux:
pacman -S qemu - Ubuntu:
apt install qemu-system-x86
- Arch Linux:
3. Run QEMU
Execute the following command:
$ qemu-system-x86_64 -bios <ovmf file> -drive format=raw,file=<hdd file> -m 512M -serial stdio -enable-kvm
Note: Replace <ovmf file> with the appropriate OVMF firmware file and <hdd file> with the HDD file you downloaded or builded.
On Real Hardware
⚠ Warning: Running skiftOS on real hardware is not recommended. It is not ready for production use and may damage your computer.
If still determined, flashing the HDD file to a USB drive can be attempted:
$ dd if=image.hdd of=/dev/sdX bs=4M status=progress
Note: Replace /dev/sdX with the appropriate destination device.
Contributing
Contributions are welcome and encouraged for this project! We practice optimistic merging, which means that pull requests are merged into the main branch as soon as possible. The goal is to keep pull requests small, focused, and incremental.
When writing commit messages, please keep them short and concise. They should be prefixed with the name of the package that the commit affects. For example:
karm-base: Fix buffer overflow in Karm::String::reserve.
Binary files should be kept as small as possible. Here are some tips for reducing the size of different image formats:
- Use SVG instead of other raster image formats whenever possible.
- Use
optipng -strip allto reduce the size of PNG images. - Use
gifsicle -O3to reduce the size of GIF images. - Use
jpegoptim -m90to reduce the size of JPEG images.
Coding Style
Just configure you IDE to use the .clang-format file at the root of the source tree, or use meta/scripts/style-format.sh to format the code.
Hello, world!
This is the first tutorial in the series. It will show you how to create a simple "Hello, world!" program in C++ for skiftOS.
Prerequisites
Create a new project
First, create a new directory for your project and navigate to it:
# You need to be in the root of the skiftOS repository

$ mkdir -p src/tutorial/hello-world

$ cd src/tutorial/hello-world

# Open the project directory in your favorite text editor, for example VSCode
$ code .
Write the manifest
Create a manifest.json file in the project directory:
{
    "$schema": "https://schemas.cute.engineering/stable/cutekit.manifest.component.v1",
    "id": "hello-world",
    "type": "exe",
    "description": "Greets the world",
    "requires": [
        "karm-sys"
    ]
}
Here is a brief explanation of the fields in the manifest:
$schema: The schema of the manifest file. It should always behttps://schemas.cute.engineering/stable/cutekit.manifest.component.v1.id: The unique identifier of the component. It should be unique across all components.type: The type of the component. It should beexefor an executable.description: A brief description of the component.requires: A list of components that this component depends on.
Write the source code
Create a main.cpp file in the project directory:
#include <karm/entry>

// The entry point of the program, skiftOS doesn't use `main` function
Async::Res<> entryPointAsync(Sys::Context &) {
    // Print "Hello, world!" to the console
    Sys::println("Hello, world!");

    // Return success
    co_return Ok();
}
Build the project
Now, build the project using the ./skift.sh script:
$ ./skift.sh build hello-world
Run the program
Finally, run the program using the ./skift.sh script:
$ ./skift.sh run hello-world
You should see "Hello, world!" printed to the console.
Conclusion
Congratulations! You have created your first program for skiftOS.
Going further
- Next tutorial: Hello, GUI!
- src/libs/karm-sys/chan.h - The system channel API is similar to stdio
Hello, GUI
In this tutorial, we will create a simple graphical user interface (GUI) application that displays a message.
Prerequisites
Create a new project
We will be starting from the hello-world project we created in the previous tutorial.
Add the GUI library
First, we need to add the GUI library to the project. Open the manifest.json file in the project directory and add the karm-ui library to the requires field:
{
    "$schema": "https://schemas.cute.engineering/stable/cutekit.manifest.component.v1",
    "id": "hello-world",
    "type": "exe",
    "description": "Greets the world",
    "requires": [
        "karm-sys",
        "karm-ui"
    ]
}
Write the source code
Update the main.cpp file in the project directory to create a text view with the message "Hello, GUI!".
#include <karm/entry>
import Karm.Ui;

Async::Task<> entryPointAsync(Sys::Context &ctx) {
    // Create a text view with the message "Hello, GUI!"
    auto app = Ui::text("Hello, GUI!");

    // Run the app
    co_return co_await Ui::runAsync(ctx, app);
}
Build and run
Build and run the project:
./skift.sh run hello-world
You should see a window with the message "Hello, GUI!".
Centering the text
You might have noticed that the text is not centered in the window. To center the text, we can use the center function:
#include <karm/entry>
import Karm.Ui;

Async::Task<> entryPointAsync(Sys::Context &ctx) {
    // Create a text view with the message "Hello, GUI!" and center it
    auto app = Ui::text("Hello, GUI!") | Ui::center();

    // Run the app
    co_return co_await Ui::runAsync(ctx, app);
}
If you build and run the project again, you should see the text centered in the window.
Conclusion
Congratulations! You have created your first GUI application for skiftOS
Going further
Karm UI provides many more features for creating graphical user interfaces. You can explore the Karm UI documentation to learn more about the available components and how to use them.
Chatty
This is the Interface Definition Language (IDL) used by skiftOS components to communicate with each other.
CuteKit
This is the Build System and Package Manager used by skiftOS.
Karm UI
Karm UI is a library for creating graphical user interfaces for skiftOS.
🛈 Note
This article is a work in progress, and is not yet complete. If you would like to contribute to the documentation, please refer to the contributing guide.
Concepts
Nodes
The basic building block of Karm UI is the node. A node is a graphical element that can be displayed on the screen. There are many types of nodes, such as text nodes, image nodes, and layout nodes.
Node are meant to be composed together to create complex user interfaces.
auto app = Ui::vflow(
    Ui::text("Hello, world!"),
    Ui::image("image.png")
);
There is three families of nodes in Karm UI:
- Leaf nodes, such as text and image nodes, that contain content to be displayed on the screen.
- Group nodes, such as flow and grid nodes, that contain other nodes.
- Proxy nodes, such as decorators, that modify the appearance or behavior of other nodes by wrapping them.
Composability
Nodes are immutable, meaning that they cannot be modified after they are created. Instead, new nodes are created by composing existing nodes together.
auto app = Ui::text("Hello, world!") | Ui::center();
In this example, the center decorator is used to center the text in the host. Note that the original text node is not modified; instead, a new node is created by wrapping the original node with the decorator using the | operator.
Tree structure
Nodes are organized in a tree structure, with each node having zero or more child nodes. The root node of the tree is the top-level node that represents the entire user interface.
auto app = Ui::vflow(
    Ui::text("Hello, world!"),
    Ui::image("image.png")
);
In this example, the vflow node is the root node of the tree, and it contains two child nodes: a text node and an image node.
Types of nodes
Views
Views also known as Leaf nodes, are the most basic type of node. They contain content to be displayed on the screen, such as text or images. They are the content of the user interface.
import Karm.Ui;

auto app = Ui::text("Hello, world!"); // A text view

auto app = Ui::image("image.png"); // An image view
Layouts
Layouts are nodes that contain other nodes. They are used to arrange nodes in a specific way, such as in a grid or a list. There are two types of layout nodes: flow and grid.
import Karm.Ui;

auto app = Ui::vflow(
    Ui::text("Hello, world!"),
    Ui::image("image.png")
); // A vertical flow layout

auto app = Ui::hflow(
    Ui::text("Hello, world!"),
    Ui::image("image.png")
); // A horizontal flow layout
Flow Layouts
A flow layout arranges its child nodes in a single row or column.
Ui::vflow(isize gaps, Math::Align align, auto... children): A vertical flow layoutUi::hflow(isize gaps, Math::Align align, auto... children): A horizontal flow layout<node> | Ui::grow(float factor): Expand the node to fill the available space, with a given factor.
Grid Layouts
A grid layout arranges its child nodes in a grid with a fixed number of rows and columns.
Child grid(GridStyle style, auto... children);: A grid layout<node> | Ui::cell(Math::Vec2i pos): Place the node in a specific cell of the grid.
Decorators
Decorators are nodes that modify the appearance or behavior of other nodes. They can be used to add borders, padding, or other visual effects to nodes.
import Karm.Ui;

auto app = Ui::text("Hello, world!") | Ui::center(); // Center the text
In this example, the center decorator is used to center the text in the host.
Here is a non exaustive list of decorators
Visibility
<node> | Ui::cond(bool visible): Show or hide a node based on a condition.
Bound and Growth
<node> | Ui::bound(): Give a visual bound to the node.<node> | Ui::placed(Math::Recti place): Place the node at a specific location.<node> | Ui::grow(float factor): Expand the node to fill the available space, with a given factor.
Alignment
<node> | Ui::align(Math::Align): Align the node in the host.<node> | Ui::center(): Center the node in the host.<node> | Ui::start(): Align the node to the start of the host.<node> | Ui::end(): Align the node to the end of the host.<node> | Ui::fit(): Fit the node to the size of the host.<node> | Ui::cover(): Cover the host with the node.<node> | Ui::vcenter(): Vertically center the node in the host.<node> | Ui::hcenter(): Horizontally center the node in the host.<node> | Ui::vcenterFill(): Vertically center the node in the host and fill the available space.<node> | Ui::hcenterFill(): Horizontally center the node in the host and fill the available space.
Size Management
<node> | Ui::sizing(Math::Vec2i min, Math::Vec2i max): Set the minimum and maximum size of the node.<node> | Ui::minSize(Math::Vec2i min): Set the minimum size of the node.<node> | Ui::maxSize(Math::Vec2i max): Set the maximum size of the node.<node> | Ui::pinSize(Math::Vec2i size): Set the size of the node.<node> | Ui::aspectRatio(f64 ratio): Set the aspect ratio of the node.
Padding and Margin
<node> | Ui::insets(int insets): Add insets between the node and its parent.
State Management
Uis are stateless by default, but you can use the state node to create stateful UIs.
import Karm.Ui;

auto app = Ui::state(
    0,
    [](auto state, auto bind) {
        return Ui::vflow(
            Ui::text("Counter: {}", state),
            Ui::button(bind(state + 1) "Increment")
        );
    }
);
In this example, the state node is used to create a stateful UI that displays a counter and a button to increment the counter. The state node takes an initial state value and a function that returns a UI based on the current state value. The bind function is used to create a callback that updates the state when the button is clicked.
Behind the scenes, the state will re-render the UI whenever the state changes and reconcile the differences between the old and new UIs to update the screen.
Going further
This document is only meant to provide a high-level overview of Karm UI. To learn more about the available components and how to use them, you can explore the source code at src/libs/karm-ui
Karm GFX
Karm GFX is an vector graphic library
Propaganda
This is a collection of propaganda materials for skiftOS. Feel free to use them to promote the project.



Project Ideas
A collection of project, app, and other ideas to be developed in the future.
Applications
- hideo-apps : Install, Update, and Manage application
- hideo-avplayer : Play audio and video file
- hideo-calendar : Plan your day
- hideo-camera : Take pictures and videos
- hideo-canvas : Whiteboard app
- hideo-chat : Talk with friends
- hideo-code : Write software for the skift platform
- hideo-map : Explore or navigate the world
- hideo-notes : Take notesé
- hideo-peoples : Manage contacts
- hideo-recoders : Record and edit audio snippets
- hideo-slides : Make presentation
- hideo-tasks : Manage runnings tasks on the system
- hideo-write : Write documents
Frameworks
- karm-gpu: GPU Stack
- Vulkan backend
- OpenGL Backend
- Virtio Backend
- CPU Backend
- Shader compiler/cross compiler
- Shader language
- karm-gfx: GPU Backend
- karm-jit: JIT and compiler backend
- karm-ui: Async::Task<> interop
- karm-av: Audio/Visual decoding, recording, and playback
- QOA support
- FLAC support
- WAV support
- Video-musics
- Simple piano roll app? DAW?
- karm-image: Image decoding
- MJPEG support
- GIF support
- PNG support
- RAWs
- hideo-images: Advanced image editing
- Lightroom-like features
- hjert kernel: SMP support
- Virtio Support
- Browser Engine
- JavaScript Engine
- karm-layout: Core layout engine (based on vaev-layout)
- karm-paint: Core compositing and painting (based on vaev-paint)
- hideo-console: Terminal emulator
- Shell
Articles
A collection of articles, videos, or just mentions of skiftOS around the web.
- 2020 System With JT (Youtube): SkiftOS (version 20.51)
- 2021 Hacker News: SkiftOS: Simple, handmade operating system for the x86 platform
- 2021 OS News: skiftOS: a hobby operating system
- 2021 Mike's Random Stuff: skiftOS
- 2021 Lobsters: skift
- 2021 Defn.io: neko.app
- 2021 Operating System Maniax
History
🛈 Note
This document is a draft for a blog post. I plan to release it in early 2024 when the first version of skiftOS reaches 10 years old
In this short document, I will try to explain the history of the project. And my 10 years jurney as a operating system developer.
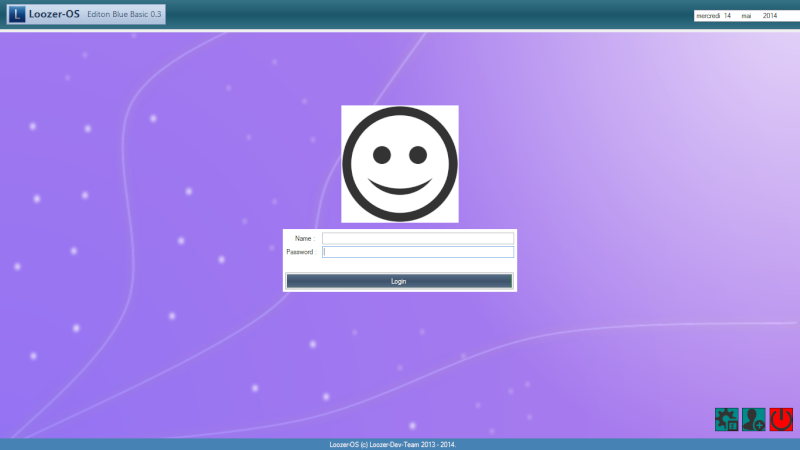
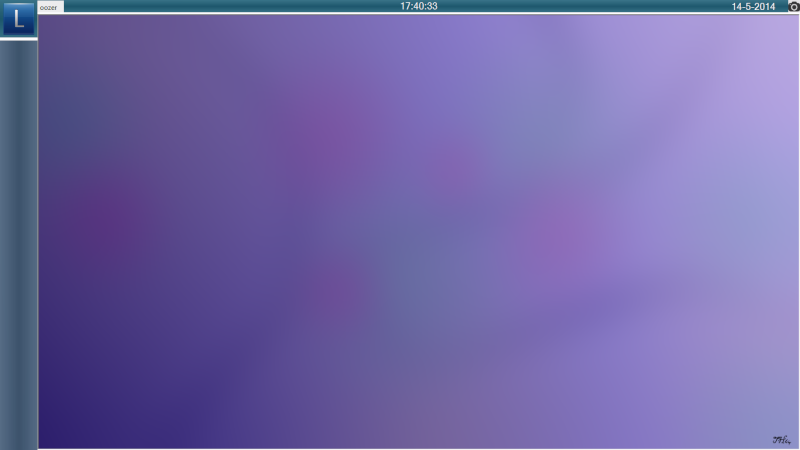
2014 - LoozerOS
The orginal name of the project was LoozerOS. It was a simple VB.NET application emulating the look and feel of an Operating System. It was a fun project to learn about programming and user interface design.
2015 - skiftOS
In 2015, the project was renamed to skiftOS because it was a better name.
2016 - 2017
During those years, the project was mostly on hold. I was busy with school and other projects. Such as my Minicraft clone
Hevadea, a Minicraft clone
2019 - Baby steps
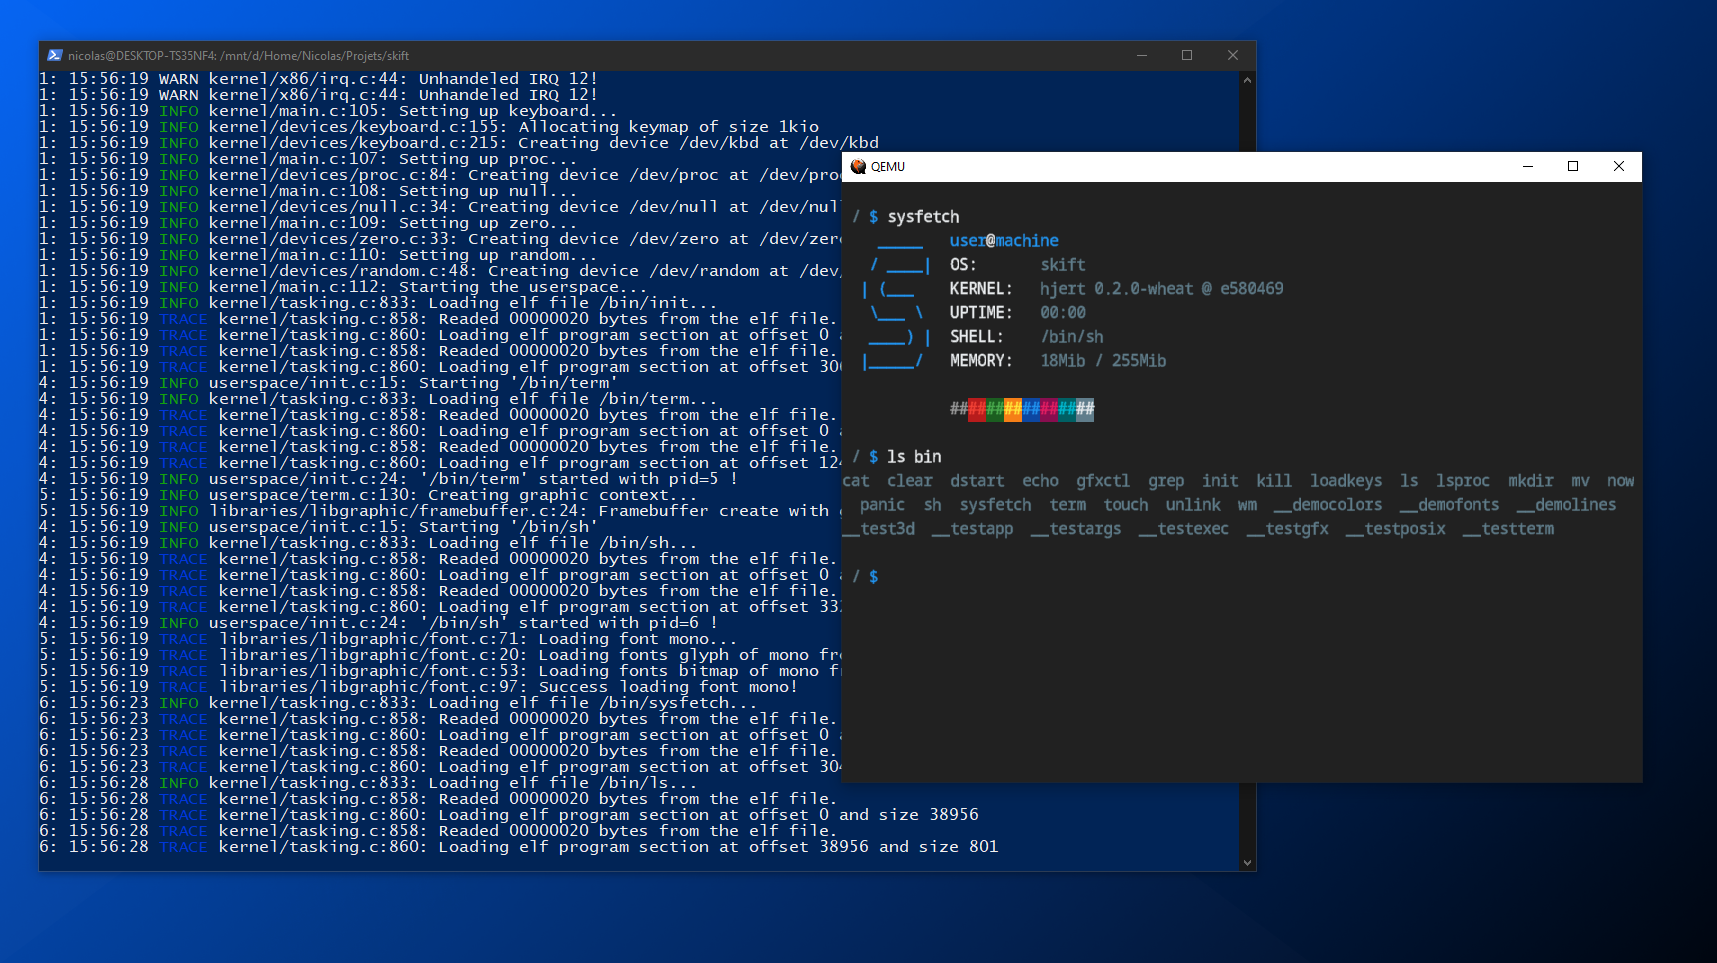
During a sleepless night, I decided to start working on skiftOS again. I started by writing a simple kernel in C and assembly.
2020 - Covid-19 and a lot of free time
In 2020, I had a lot of free time because of the Covid-19 pandemic. I decided to work on skiftOS again. I started by rewriting the kernel in C++ and adding a lot of features.
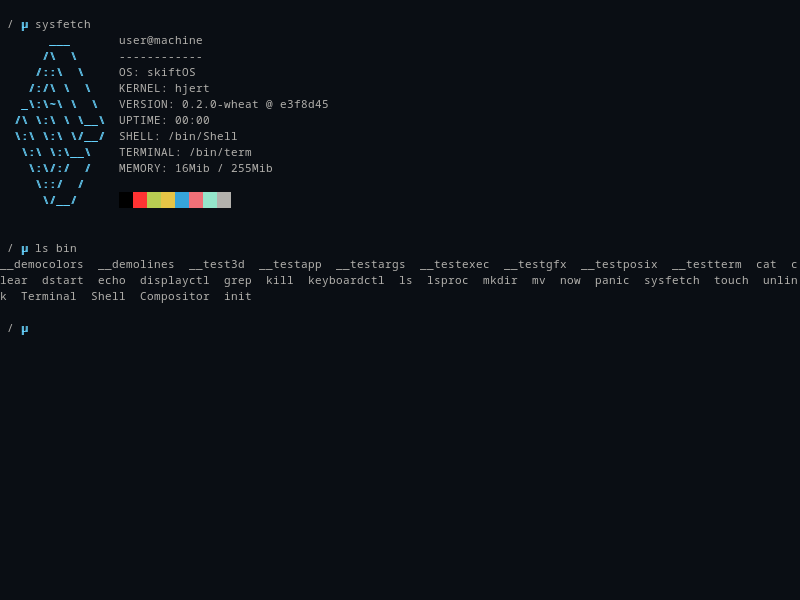
Better font rendering
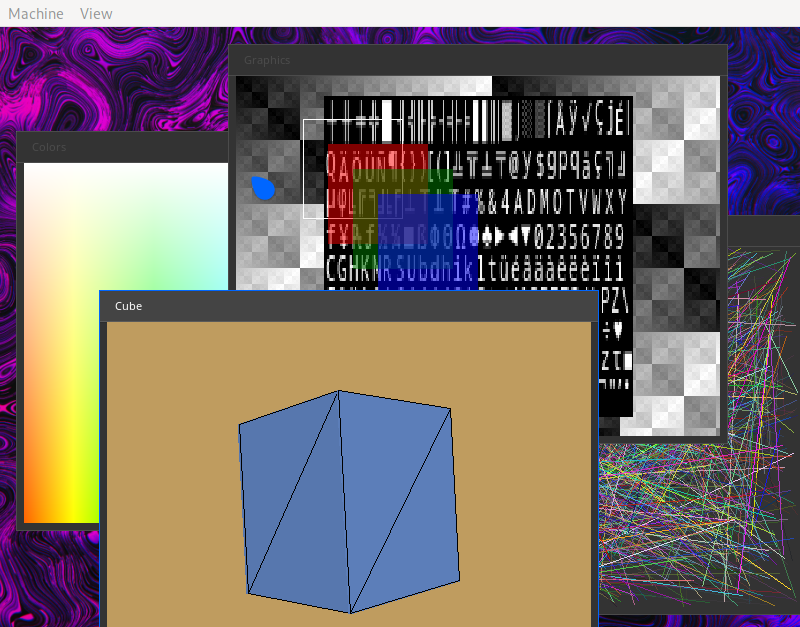
Simple desktop environment and window manager
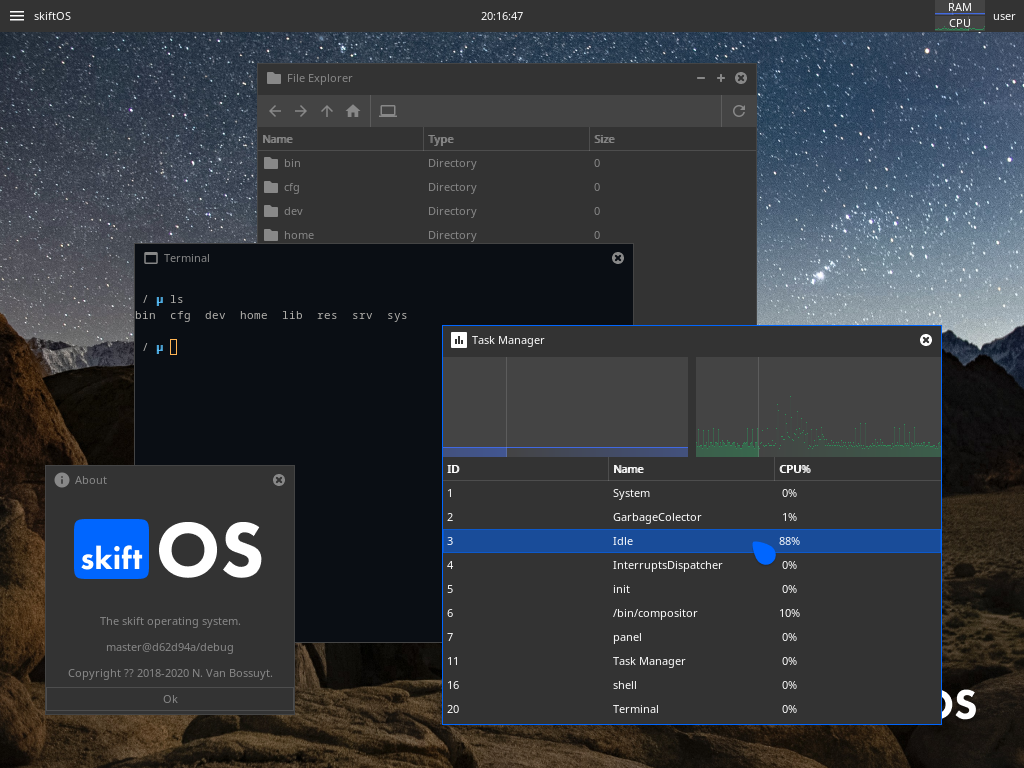
Simple terminal emulator, task manager and file manager
At the end of 2020, JT did a presentation about skiftOS at on her youtube channel System with JT.
2021 - Hello Hacker News and the UNIX Utopia!
At the beginning of 2021, we started to get some traction on Hacker News
By the end of june of 2021, I was kind of burned out by the project and writing C++ in general. And started to work on a new project called BRUTAL. Where skift was a monolithic kernel, BRUTAL is a microkernel. Where skift was written in C++, BRUTAL is written in C. It was tones of fun to work on BRUTAL with @supercip971. We learned a lot about operating system design, C and the x86_64 architecture.
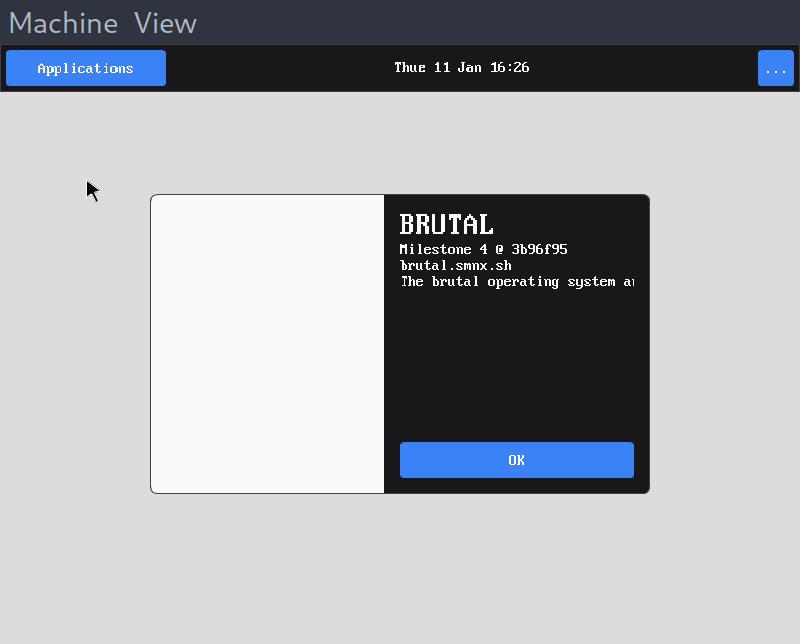
BRUTAL running on QEMU
2022 - A new beginning
By july of 2022, I was missing working on skiftOS and Cyp wasn't available to work on BRUTAL. So I decided to start working on skiftOS again. I started the project from a clean slate. I choose the rewrite everything in modern C++20 and to use a microkernel architecture. The project started as a framework inspired by the rust standard library and user interface framework inspired by Iced and Compose. I also decided to use a capability-based security model.
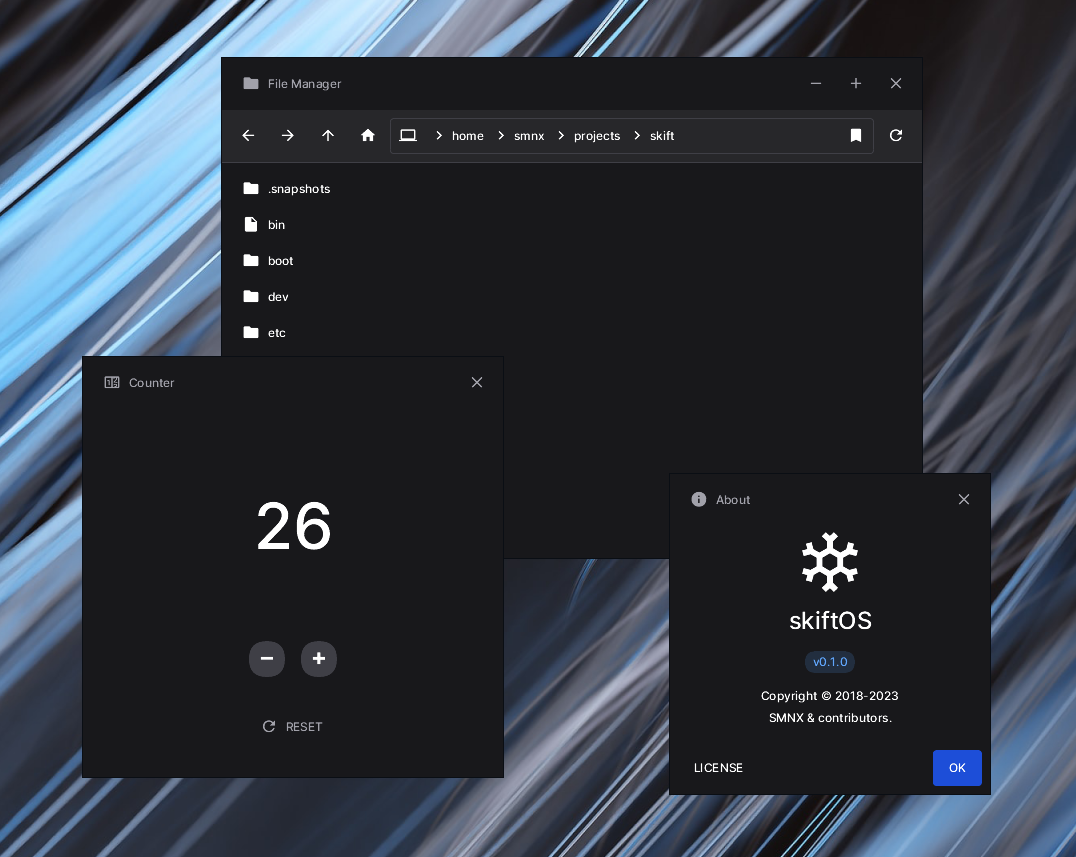
By september, we had a MVP of the framework and the user interface library running on Linux.
2023 - New job and not much free time
In 2023, I started a new job and I didn't have much free time to work on skiftOS. I was mostly working on the framework and the user interface library. But I managed to build a working prototype of the microkernel, bootloader and the user interface shell.
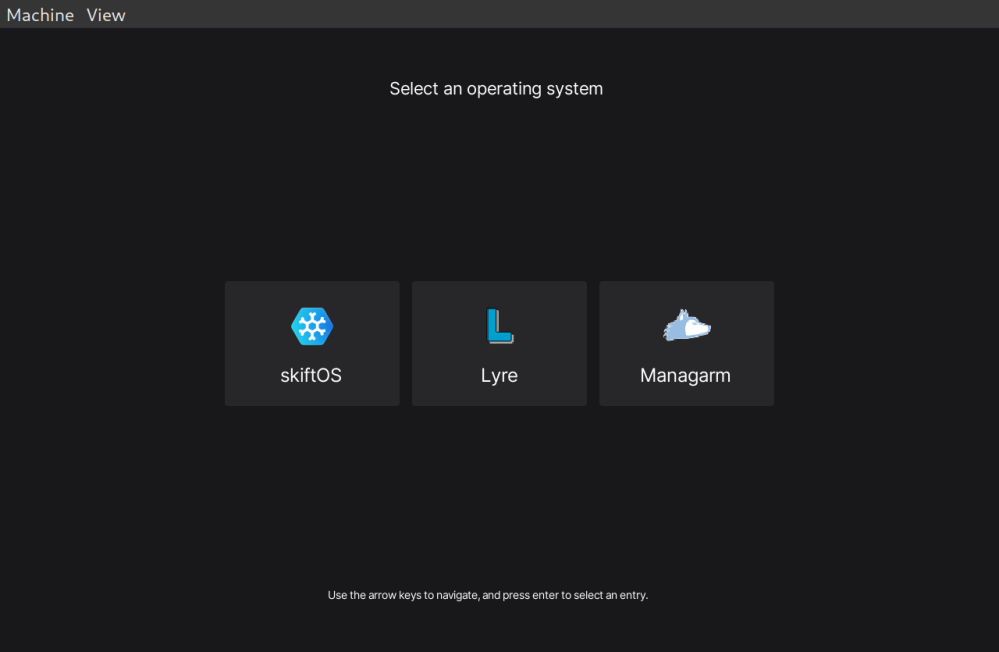
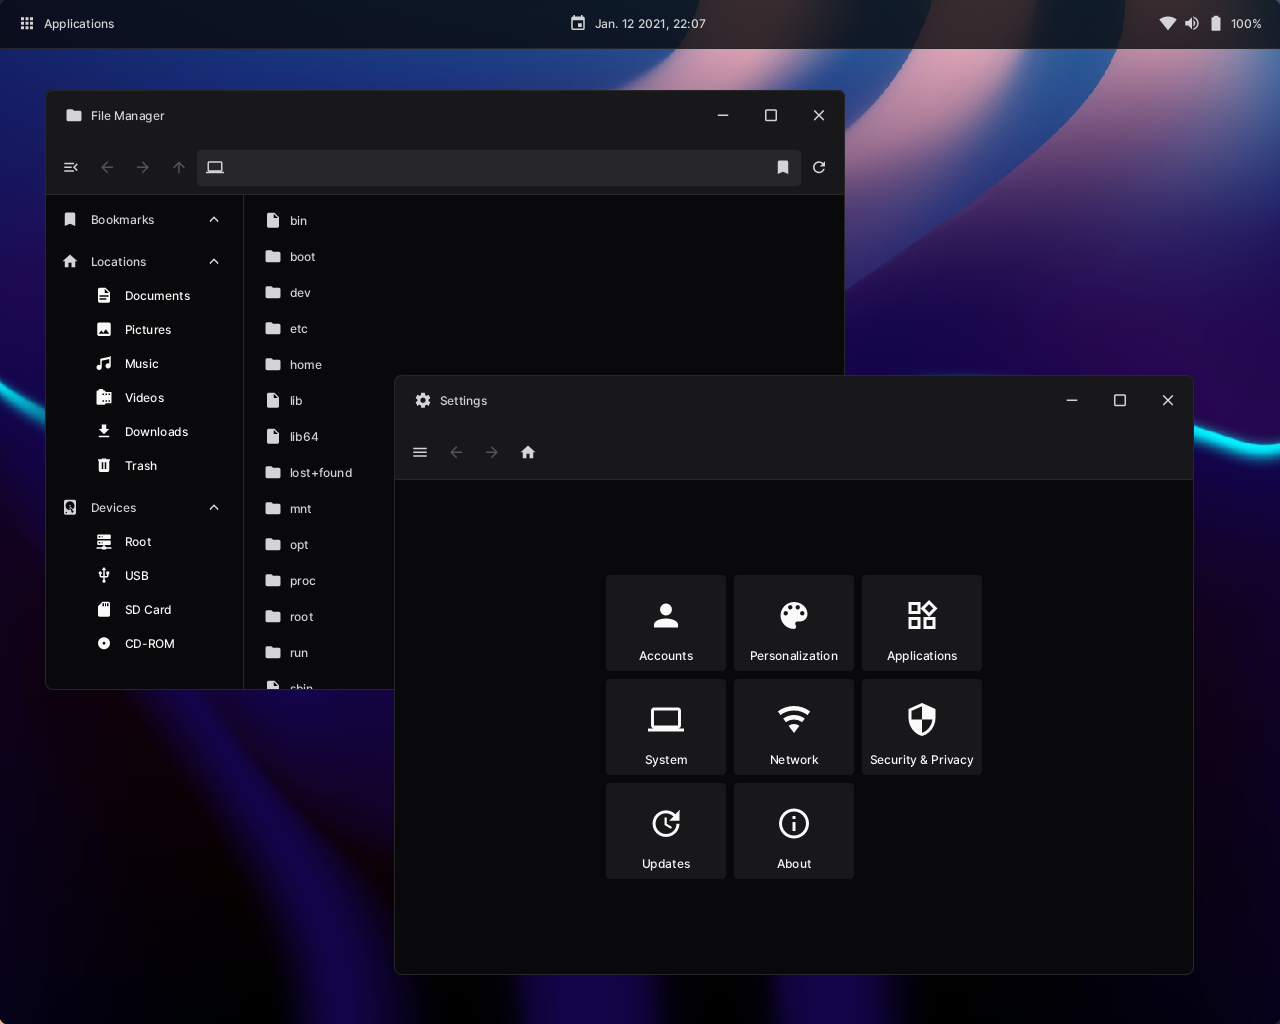
By june, we had a working prototype of the microkernel, bootloader and the user interface shell.
2024 - The first release
I hope to release the first version of skiftOS in 2024 2025 2026
Beyond
Thanks for reading this short history of the project. See doc/roadmap for more information about the future of the project. I so excited to see where this project will go in the future. I hope you will join me in this journey (See doc/contributing). 😊
Usefull links
A collection of usefull links to articles, videos, etc. that might help you understand the concepts behind the project.
Project philosophy

- Richard Feymann - "What I cannot create, I do not understand."
- Programmers are Tiny Gods - "Programmers are the Gods of their tiny worlds. They create something out of nothing. In their command-line universe, they say when it’s sunny and when it rains. And the tiny universe complies." - Derek Powazek
User interface
These articles are some of the inspiration for the user interface of skiftOS.

